Last time we saw how to deploy iOS apps with FastLane, now let us see how to use FastLane to push Android apps to Google Play Store.
If you are an android developer, this article will be very useful as it solves the challenges in deploying an app. In this article, we will see how to deploy an Android app with a single click using Fastlane. Before we go any further, I would like to explain what FASTLANE is.
What is Fastlane?
Fastlane is an open-source platform and a continuous delivering tool aimed at simplifying the deployment of Android and iOS. It is written in Ruby. Fastlane automates the tedious tasks of your deployment and release workflow. It handles all the tasks, like generating screenshots, dealing with code, signing and releasing your application.
NOTE: Before moving into the Fastlane, you should install the Ruby and JAVA 8 on your device irrespective of the OS you have.
Let’s begin using Fastlane by setting up the Ruby and JAVA 8.

STEP 1: Install Ruby
First, we need to install Ruby on our system for supporting the Fastlane commands. Just follow the below snippet to install Ruby.
sudo apt-add-repository ppa:brightbox/ruby-ng

sudo apt-get install ruby2.6.1

sudo apt-get install yum

sudo apt-get install ruby-dev

sudo apt-get install ruby`ruby -e 'puts RUBY_VERSION[/\d+\.\d+/]'`-dev
STEP 2: Install JAVA 8
Run the below commands to install JAVA 8 on your device.
sudo add-apt-repository ppa:webupd8team/java
sudo apt-get update
sudo apt-get install oracle-java8-installer
The apt repository also provides the package oracle-java8-set-default to set Java 8 as your default Java version. Use the following code to set JAVA 8 as your default Java
sudo apt-get install oracle-java8-set-default
After the successful installation makes sure of the Java version. Now, we step into the Fastlane setup.
STEP 3: Install Fastlane
After the successful installation of Ruby and Java on your terminal, navigate to your project folder to install Fastlane. Install Fastlane using
# using Rubygem
sudo gem install fastlane -NV
On your terminal, navigate to the project root directory and initialize the Fastlane in your project and run the following code
fastlane init
It takes a few pieces of information that will confirm you are ready to begin the Fastlane.
To get started quickly:
Provide the package name of your application when asked (eg. com.example.fastlane)
Press Enter when asked for the path of your secret json file
Answer ‘n’ when asked if you plan on uploading info to Google Play via Fastlane
That’s it. Fastlane will automatically create a Fastlane file based on your configuration inside your project folder. Newly created Fastlane folder will contain the following files
- Appfile which defines the configuration of your app.
- Fastfile which defines the “lanes” that drives the function of your Fastlane.
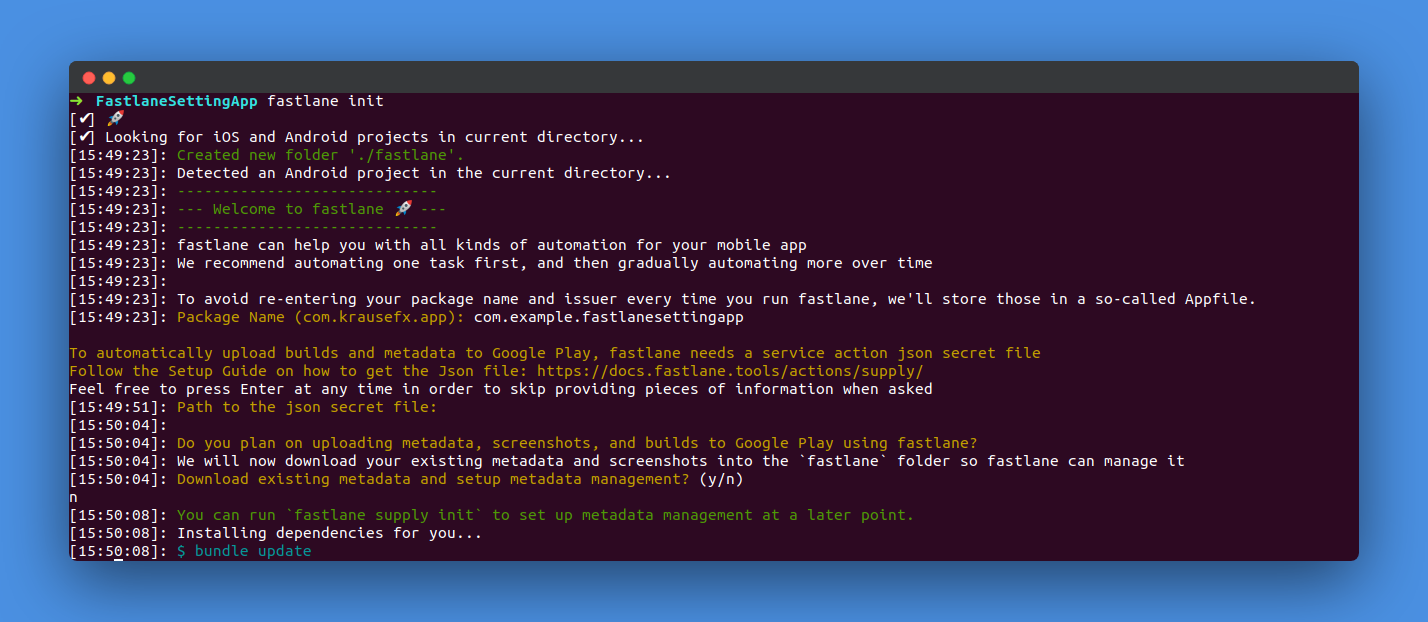 Figure: Fastlane init on terminal
STEP 4: Collect your Google Credentials
The following comments are used for creating the json secret file on Google Play Console.
- Open the Google Play Console on your browser
- And then click the Settings button, followed by API access
- Click the CREATE SERVICE ACCOUNT button and then create your service account.
- Follow the Google Developers Console link from the dialog, which opens a new tab/window:
- Click the CREATE SERVICE ACCOUNT button which will be at the top of the Google Developers Console
- Provide a Service account name
- Click on Select a role and choose Service Accounts > Service Account User
- Check the Furnish a new private key checkbox
- Make sure JSON is selected as the Key type
- Select SAVE to close the dialog
- Make a note of the JSON file name downloaded to your computer
- Go back to the Google Play Console, and click DONE to close the dialog
- Click on Grant Access for your newly added service account on Google Play Console.
- Select Release Manager
- Click on ADD USER for closing the dialog.
After successful implementation of the above steps, Google Play Console provides the json secret file and gets downloaded automatically. Put your json secret file inside the project folder.
STEP 5: Edit Appfile
This is one of the important sections while integrating Fastlane. You have to edit the Appfile based on your configuration. The following snippet shows the things you need to edit it in your Appfile.
json_key_file("YOUR_JSON_SECRET_FILE_NAME.json") # Path to the json secret file - Follow https://docs.fastlane.tools/actions/supply/#setup to get one
package_name("YOUR_PACKAGE_NAME") # e.g. com.krausefx.app
You can edit your json secret file name ( it should be easily recognizable ). Rephrase your json file name instant “YOUR_JSON_SECRET_FILE.json” ( eg. json_secret_file.json ). And also put your package name instant “ YOUR_PACKAGE_NAME” ( eg. com.samplefastlane.app ).
STEP 6: Edit Fastfile
The most important file in Fastlane is Fastfile. It contains all the information about your project. Now we will focus on editing the fastfile for uploading your app on Google Play Store. Following snippet shows the things we need to edit in the Fastfile.
# This file contains the fastlane.tools configuration
# You can find the documentation at https://docs.fastlane.tools
#
# For a list of all available actions, check out
#
#     https://docs.fastlane.tools/actions
#
# For a list of all available plugins, check out
#
#     https://docs.fastlane.tools/plugins/available-plugins
#

# Uncomment the line if you want fastlane to automatically update itself
# update_fastlane

default_platform(:android)

platform :android do
  desc "Runs all the tests"
  lane :test do
    gradle(task: "test")
  end

  desc "Submit a new Beta Build to Crashlytics Beta"
  lane :beta do
    gradle(task: "clean assembleRelease")
    crashlytics

    # sh "your_script.sh"
    # You can also use other beta testing services here
  end
// This is our application deployment coding section

  desc "Deploy a new version to the Google Play"
  lane :deploy do
    gradle(task: "clean assembleRelease",
     properties: {
        "android.injected.signing.store.file" => "YOUR_JKS_FILE_PATH",
        "android.injected.signing.store.password" =>                  "YOUR_RELEASEKEY_PASSWORD",
        "android.injected.signing.key.alias" => "YOUR_KEY_ALIAS",
        "android.injected.signing.key.password" => "YOUR_RELEASEKEY_PASSWORD",
        })
    upload_to_play_store(track: 'internal')
  end
end
YOUR_JKS_FILE_PATH : Give your jks file path from your device ( eg. home/user/androidprojects/samplefastlane.jks )
You can edit your track, which will decide where you want to deploy your android application on the Google Play Store. Lane defines the function of fastlane. Gradle is the first call to clean the assemble and the caches in your project. And then it will call the properties which contain all of your release properties. Properties are automatically cross-checked by the json secret file. Then use upload_to_play_store function to upload the Android app to Play Store which contains the track field of the deployment track ( eg. beta, alpha or production ).
STEP 7: Deploy an Android application on Google Play Store
This is the final step to deploy an android app on the Google Play Store with a single click.
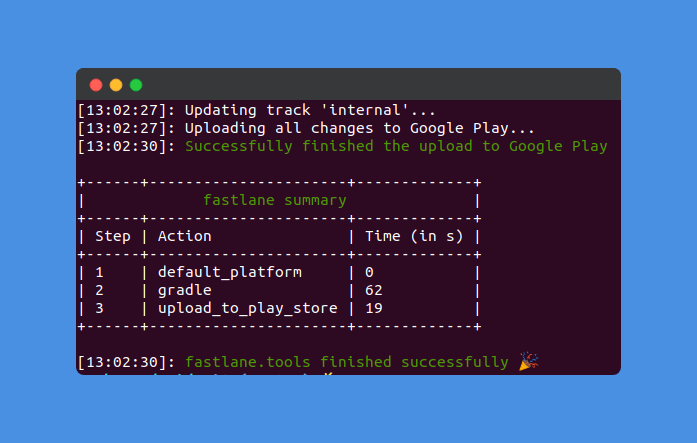
After successful implementation of Fastlane in your project, tedious tasks like signing certificates and taking screenshots will be automatically done while deploying an android application. On the terminal, navigate to your project directory and run the below code to deploy an android app.
fastlane android deploy
That’s it!!! Below screenshot shows the uploading process of application on Google Play Store.
I hope you guys learned something about Fastlane.

Up next
How we Automate iOS App Distribution with Fastlane