

React, Angular and Vue developers would know the packages, node_modules, dependencies they would have to maintain and compile in their app during runtime. This would definitely pull down the speed of the application by a very few milliseconds. Yes, it is very small, but combine every decrease in speed and take a look. We would have lost a couple of seconds, which is crucial. So why don’t we do everything when building the app itself. Instead of compiling at runtime, why don’t we build everything ready before rendering?

That’s where SvelteJS comes in handy. Svelte is not a framework, but rather a compiler. Svelte does not use the virtual DOM, but rather makes use of the real DOM. Svelte takes advantage of this and is lightning fast. So let’s dive a little deeper into creating a simple Todo List using svelte.
In the app, we will take a look at
- How to create a svelte component
- How to pass props between the components
- How to call a function between components
If you are a React developer, you will be familiar with passing props and functions as props or components.
Setting up the Svelte App:
There are 2 ways to get you started with the Svelte template
- Use the REPL
- Use degit
For this app, we will use degit. If you do want to use REPL follow the instructions here .
Use degit:
Degit is a project scaffolding tool. Open your terminal and do the following to create your svelte project.
npx degit sveltejs/template sample-svelte-projectcd sample-svelte-projectnpm installnpm run dev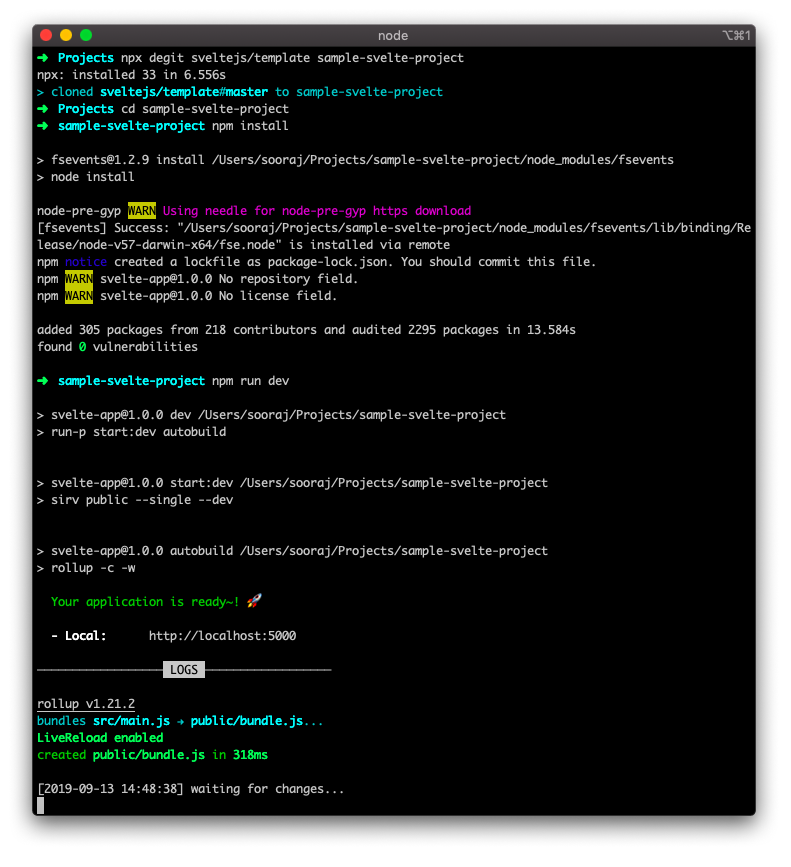
Let’s now take a look at the project structure.
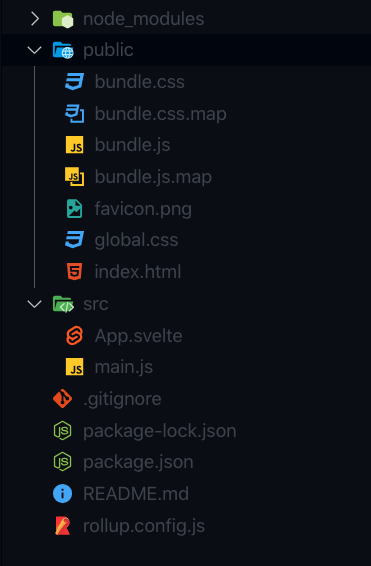
It is quite similar to a React project. If you see the src directory, you will find that there is a main.js and App.svelte. Imagine the main.js like your index.js which is going to interact with the DOM by compiling everything together. The ‘.svelte’ files are separate components that have its own HTML, CSS and js code. Let’s take a look at the default files
App.svelte
<script> export let name</script>
<style> h1 { color: purple; }</style>
<h1>Hello {name}!</h1>It is just a simple component with HTML, CSS, and js. The good thing about svelte components is that the styles remain inside the component block level. Meaning, adding style to the h1 tag in App.svelte will not be reflecting on any h1 tags used outside of App.svelte. Like Angular and React, the variables are used in the same way.
main.js
import App from "./App.svelte";
const app:new App({ target: document.body, props: { name: "world", },});
export default app;Here is where svelte compiles and builds your app. It imports the component App and creates a new element inside the real DOM body with the props name.
Now let’s see our page live
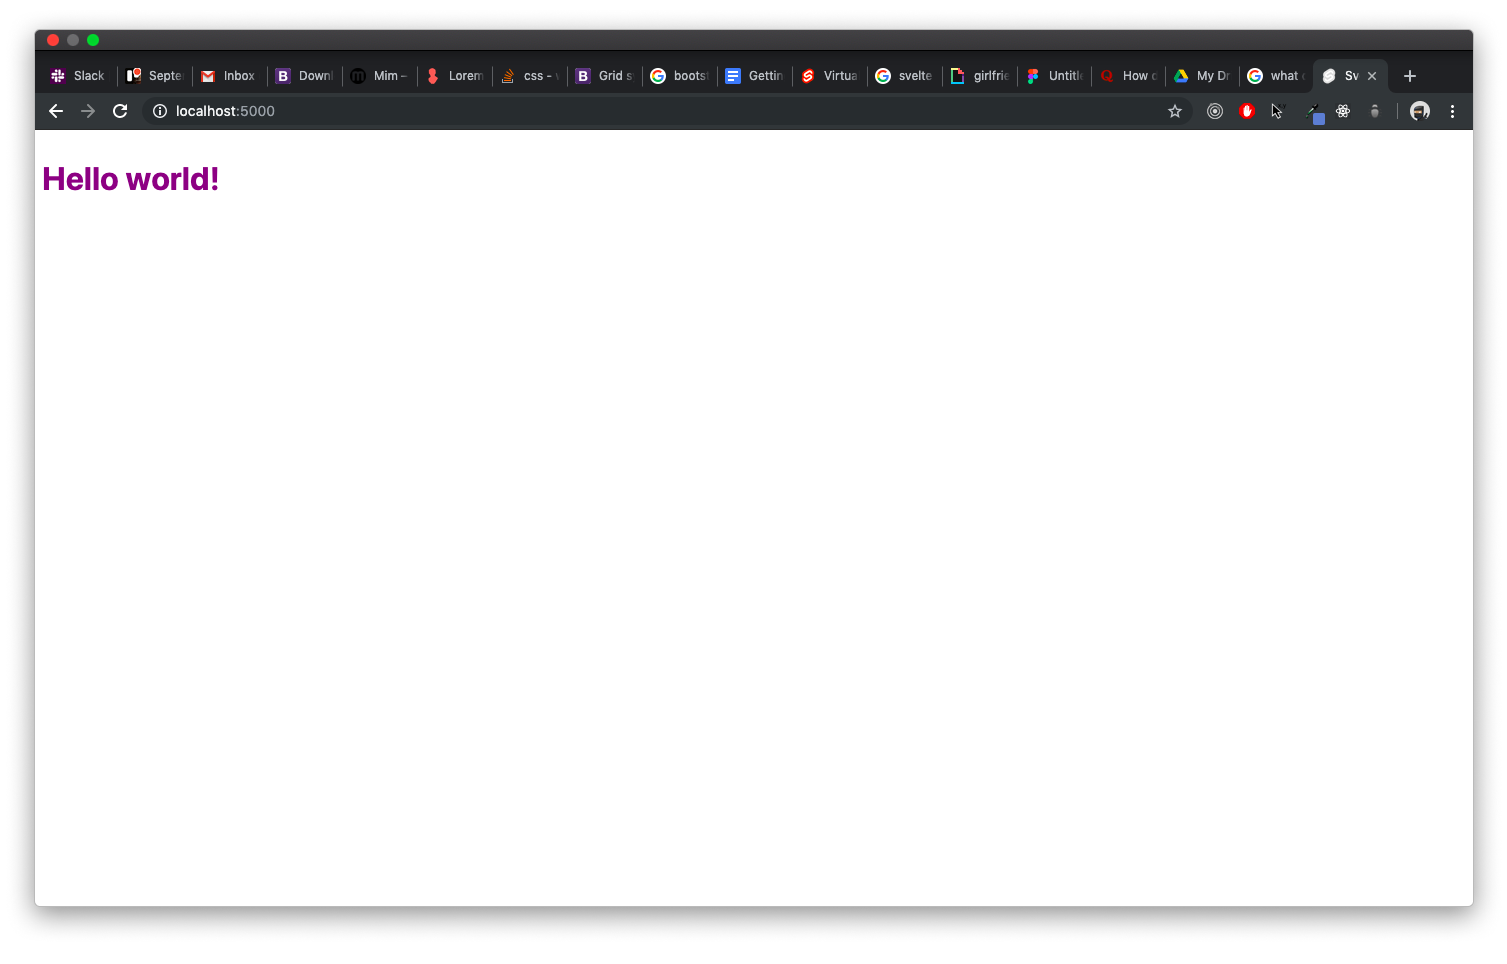
Rendered so fast! didn’t it?

Programmer: npm ru…. Svelte: Done!
This is what’s cool about Svelte. After you have made changes to your code, hit save, check your bundle.js under public and you will be able to find all your components, classes, texts declared everything compiled and ready, just waiting to be rendered.
Now let’s change things up a bit for the todo-list. We will split our app into 4 different svelte components.
- App.svelte
- Sidebar.svelte
- Todo.svelte
- TodoView.svelte
- main.js
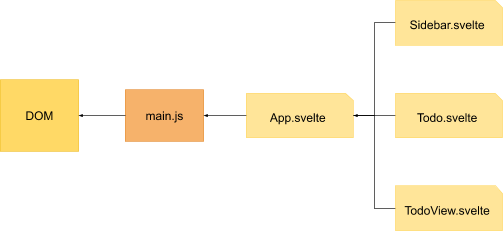
Todo List App flow
Let’s take a look at them individually.
main.js
import App from "./App.svelte";
const app:new App({ target: document.body,});
export default app;We don’t need to pass any props to the App component, for now, so ignoring the props.
Sidebar.js
<script> import Todo from './Todo.svelte'
export let viewTodo export let removeTodo
let todo: '' let todoList: [] function addTodo(e) { if (e.keyCode === 13) { todoList: todoList.concat(todo) todo: '' } }
function todoDone(key) { var temp: todoList temp.splice(key, 1) todoList: temp removeTodo() }</script>
<style> .sidebar-container { position: fixed; right: 0; width: 400px; height: 100vh; background-color: #fff; top: 0; z-index: 999; box-shadow: 1px 1px 20px #000; } .todo-input { width: 100%; height: 5%; } input { color: rgb(56, 56, 56); font-weight: 70; font-size: 15px; } input::placeholder { color: rgb(165, 165, 165); font-weight: 70; font-size: 15px; } .empty-todo { padding: 10px; height: 100%; width: 100%; display: flex; justify-content: center; align-items: center; flex-direction: column; color: rgb(133, 133, 133); font-weight: 70; font-size: 15px; } .todo-list-container { overflow-y: scroll; height: 95%; }</style>
<div class="sidebar-container"> <input placeholder="Enter todo list" type="text" class="todo-input" bind:value="{todo}" on:keydown="{addTodo}" /> <div class="todo-list-container"> {#if !todoList.length} <div class="empty-todo">No Todos yet!</div> {:else} {#each todoList as todo,i } <Todo todo="{todo}" key="{i}" viewTodo="{viewTodo}" todoDone="{todoDone}" /> {/each} {/if} </div></div>A very simple todo list sidebar. We will just create an array to store the todos and render the todos as a different component.
Todo.js
<script> export let todo; export let key; export let todoDone; export let viewTodo;
const completedMessage:["I'm Done!", "Accomplished!", "Finished!", "Done and dusted!", "Done for the day!", "Peace out!", "Cash me outside!"];
function setRandomCompletedMessage() { var index:Math.floor(Math.random() * 7); return completedMessage[index]; }</script>
<style> .todo-item-wrapper { padding: 10px; color: rgb(65, 65, 65); font-weight: 70; font-size: 15px; display: flex; justify-content: space-between; align-items: center; }
.todo-item { cursor: pointer; } .done-btn { background-color: #fff; border-radius: 15px; color: rgb(65, 65, 65); cursor: pointer; }</style>
<div class="todo-item-wrapper"> <div class="todo-item" on:click="{viewTodo.bind(this," todo)}>{todo}</div> <button class="done-btn" on:click="{todoDone.bind(this," key)}> {setRandomCompletedMessage()} </button></div>We will just render the new Todo as the received props. We will also add a finish button to pop that element out of the array.
TodoView.js
<script> let width:document.body.clientWidth; width:width - 400;
export let currentTodo;
var extras:[];
var currentTodoExtra:extras[currentTodo] ? extras[currentTodo] : "Sample";</script>
<style> .view-todo-container { height: 100%; display: flex; justify-content: center; align-items: center; } .current-todo-wrapper { background-color: #fff; height: 95%; width: 95%; display: flex; justify-content: center; align-items: center; flex-direction: column; box-shadow: 0px 0px 20px #000; border-top-right-radius: 40px; } .current-todo-item { color: rgb(56, 56, 56); font-size: 40px; font-weight: 100; }</style>
<div class="view-todo-container" style="{`width:${width}px`}"> {#if currentTodo.length} <div class="current-todo-wrapper"> <div class="current-todo-item">{currentTodo}</div> </div> {/if}</div>This is just an additional feature to View the props into another component. Like Sidebar to App and then App to TodoView.
App.svelte
<script> import Sidebar from './Sidebar.svelte' import TodoView from './TodoView.svelte'
var currentTodo: ''
function viewTodo(todo) { currentTodo: todo }
function removeTodo() { currentTodo: '' }</script>
<TodoView currentTodo="{currentTodo}" /><Sidebar viewTodo="{viewTodo}" removeTodo="{removeTodo}" />Finally let’s see out app in action.
And we’ve done it

Programmer: We won…..!
Subscribe to our newsletter
Get the latest updates from our team delivered directly to your inbox.
Related Posts
10 Gems in Ruby that you will love
Let's go back to basics with Ruby on Rails and see some of the Gems that we use everyday at skcript. #StartWithSkcript
18 Python packages you should be using right now
Let us look at some python packages that will get you started on your machine learning path #StartWithSkcript
#100DaysOfCommits
Our CTO, Swaathi, talks about our commitment to the #100DaysOfCommit challenge. Join us.