Since workers are now readily available in LTS versions of Node, we'll learn how to do job scheduling with Bree package. You will also learn how to use Redis along with a Node JS package called Kue for a simple node js application. Read more.
Update: Node.js workers are now available in LTS versions and there’s a new package Bree that makes use of it! It makes job scheduling a breeze. I’ve updated the blog post that covers job scheduling with Bree using Workers. Alternatively, there’s also an implementation with Kue with which this post was based. I would not recommend it, since it’s no longer maintained.
Bree
Bree comes with so many features right out the box. It’s a job scheduler for Node.js with support for cron, dates, ms, later, and human-friendly strings. Bree uses workers and spawns sandboxed processes, supports async/await, retries, throttling, concurrency, and cancelable jobs (graceful shutdown)! It’s well suited for production environments at scale.
Why Bree?
The foreword on their GitHub repository explains it beautifully,
“Before creating Bree, I was a core maintainer (and financially invested in development) of Agenda. I have been with the Node.js community for a very, very long time, and have tried literally every solution out there (see Alternatives that are not production-ready). I have found that all existing solutions are subpar, as I have filed countless issues; discovered memory leaks found functionality not working as described, unresolved core bugs have persisted over time, etc.
Previous to creating this, I was relying heavily on bull; having created @ladjs/bull – but due to core issues (and being Redis-backed) it was not the best tool for the job. Bull might have been okay if the core issues were fixed, however since it uses Redis it should not be used for a job queue. From my experience, Redis should only be used for caching and session storage purposes (e.g. CDN or managing user login state in your application).
Since workers are now readily available in LTS versions of Node, I thought it would be a great time to implement them in a job scheduler environment. Additionally, my research and development of a better anti-spam and anti-phishing classifier with Spam Scanner gave me some necessary insight to using workers.
Bree was created to give you fine-grained control with simplicity and has built-in support for workers, sandboxed processes, graceful reloading, cron jobs, dates, human-friendly time representations, and much more. We recommend you to query a persistent database in your jobs, to prevent specific operations from running more than once. Bree does not force you to use an additional database layer of Redis or MongoDB to manage the job state. In doing so, you should manage the boolean job states yourself using queries. For instance, if you have to send a welcome email to users, only send a welcome email to users that do not have a Date value set yet for welcome_email_sent_at.”
Bree was created by @niftylettuce, a prolific GitHub and npm contributor who is also an Express Technical Committee Member and Core Member.
Setting up the project
This example project will send an email after a person books a movie ticket. The first email will be the confirmation of the booking which will be sent out as soon as the movie is booked. The second email will be a reminder email that will be sent 10 minutes before the movie timing by a job scheduled using Bree.
This example simply writes to the file system. To use as a persistent database, however you could plug in MongoDB (e.g. Mongoose), SQL, Redis, or any other storage mechanism you desire.
We’ll be using npm init to set up a Node JS project.
First things first, let’s create a directory for your project. I have assumed the project name as node-js-job-scheduling. Using mkdir node-js-job-scheduling , create your directory.
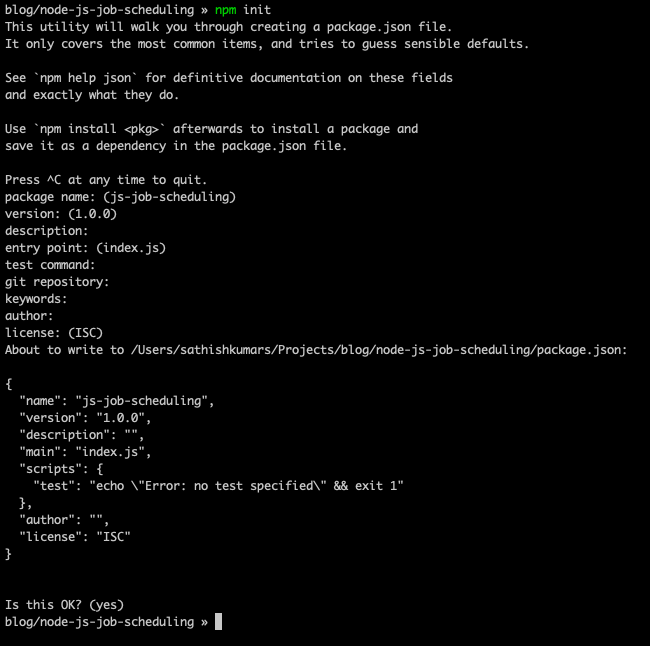
Run npm init until the process is finished. You can also add required attributes if you like to. You had nothing, but you have this now.

Let’s call NPM for help
We’ll be installing some npm packages to set up a simple express server and test out an API endpoint. Let’s hope it responds to our call on the first try.
Install express & body-parser to set up a simple server that listens to a port.
npm install express body-parser --save
Just Listen
Create a index.js file in the root of the project and set up a simple application like the following:
const express = require("express"),
  app = express(),
  bodyParser = require("body-parser");

// support parsing of application/json type post data
app.use(bodyParser.json());

// test endpoint
app.get('/test', (req, res) => {
  res.sendStatus(200);
});

app.listen(8080, () => console.log(`Hey there! I'm listening.`));
Now, curl http://localhost:8080/test will result with a success response. All good. For more information on the setup, please refer index.js from the example repository.
Email-templates for Node.js emails
Previously, I’d have used Nodemailer for emails, but Email-Templates are a lot more easier and it does not use any third parties which makes it easier for development.
npm i email-templates --save
Now, we’ll write a test endpoint that sends out an email.
const Email = require('email-templates');
// send email test endpoint
app.post('/send-email', async (req, res, next) => {
  try {
    // validate email
    if (!isSANB(req.body.email) || !isEmail(req.body.email))
      throw new Error('Email was invalid');

    // send email
    await email.send({
      message: {
        to: req.body.email,
        subject: 'Hello, World!',
        html: '<p>Hello, World!</p>'
      }
    });

    // send response
    res.sendStatus(200);
  } catch (err) {
    next(err);
  }
});
Now, curl -X POST http://localhost:8080/send-email -d "[email protected]" will respond with a success response, and the email preview will be opened in your browser.
Bree for Job Scheduling
Usage
The example below assumes that you have a directory called “jobs” at the root of the directory. Inside the jobs directory are individual scripts that are run using workers.
Let’s create a file called bree.js. Make sure you run node bree.js.
name: The name of the job. This should match the base file path (e.g. foo if foo.js is located at /path/to/jobs/foo.js) unless path option is specified. A value of index, index.js, and index.mjs are reserved values and cannot be used here.interval: Default interval for jobs (e.g. a value of 0 means that there is no interval, and a value greater than zero indicates a default interval will be set with this value). This value does not apply to jobs with a property of cron.
For more information, check out the documentation.
const Bree = require('bree');
const Cabin = require('cabin');
const Graceful = require('@ladjs/graceful');
const { Signale } = require('signale');

// initialize cabin
const cabin = new Cabin({
  axe: {
    logger: new Signale()
  }
});

const bree = new Bree({
  logger: cabin,
  jobs: [
    {
      name: 'email',
      interval: '10s'
    }
  ]
});

// handle graceful reloads, pm2 support, and events like SIGHUP, SIGINT, etc.
const graceful = new Graceful({ brees: [bree] });
graceful.listen();

// start all jobs (this is the equivalent of reloading a crontab):
bree.start();
Now, we’ll have /jobs/email.js that sends out a reminder email.
const fs = require('fs');
const path = require('path');
const { parentPort } = require('worker_threads');
const Cabin = require('cabin');
const Email = require('email-templates');
const { Signale } = require('signale');
// initialize cabin
const cabin = new Cabin({
axe: {
logger: new Signale()
}
});
// store boolean if the job is cancelled
let isCancelled = false;
// handle cancellation (this is a very simple example)
if (parentPort)
parentPort.once('message', message => {
if (message === 'cancel') isCancelled = true;
});
// initialize email-templates
const email = new Email({
message: {
from: '[email protected]'
},
transport: {
jsonTransport: true
}
});
// load the queue
const queueFile = path.join(__dirname, '..', 'queue.json');
if (!fs.existsSync(queueFile)) {
cabin.info(`queue file does not exist yet: ${queueFile}`);
// signal to parent that the job is done
if (parentPort) parentPort.postMessage('done');
else process.exit(0);
}
const queue = require(queueFile);
(async () => {
// send emails
await Promise.all(
queue.map(async result => {
// if we've already cancelled this job then return early
if (isCancelled) return;
// if it's before the time we need to send the message then return early
if (Date.now() < new Date(result.date).getTime()) {
cabin.info('It it not time yet to send message', { result });
return;
}
try {
// send the email
await email.send({
message: {
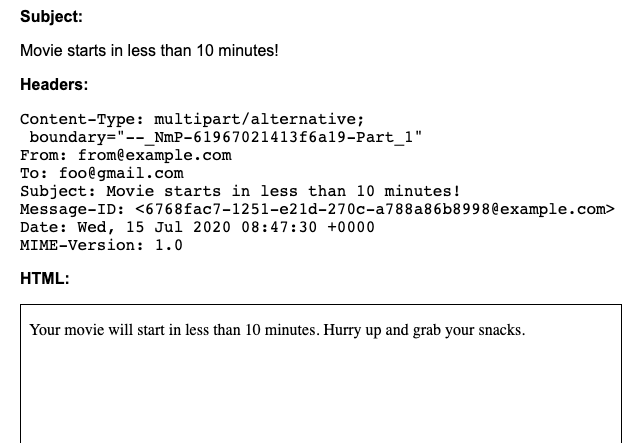
to: result.email,
subject: 'Movie starts in less than 10 minutes!',
html:
'<p>Your movie will start in less than 10 minutes. Hurry up and grab your snacks.</p>'
}
});
// flush the queue of this message
try {
const currentQueue = require(queueFile);
const index = currentQueue.findIndex(r => r.id === result.id);
if (index === -1) return;
delete currentQueue[index];
await fs.promises.writeFile(
queueFile,
JSON.stringify(currentQueue.filter(Boolean))
);
} catch (err) {
cabin.error(err);
}
} catch (err) {
cabin.error(err);
}
})
);
// signal to parent that the job is done
if (parentPort) parentPort.postMessage('done');
else process.exit(0);
})();
Schedule a Node JS Job
We’ll now write an API that accepts the user email and the time of the movie (usually fetched from DB) and add a job to the queue to send out the reminder Email. Inside index.js,
// ticket booking endpoint
app.post('/book-ticket', async (req, res, next) => {
  try {
    // validate email
    if (!isSANB(req.body.email) || !isEmail(req.body.email))
      throw new Error('Email was invalid');

    const movieTime = isSANB(req.body.start_time)
      ? dayjs(req.body.start_time, 'M/D/YY h:mm A')
      : false;

    if (!movieTime || !movieTime.isValid())
      throw new Error('Movie time is invalid (must be M/D/YY h:mm A) format');

    // add an email to the queue for this ticket we booked (subtract 10 mins from start time)
    let queue = [];
    try {
      queue = require(queueFile);
    } catch (err) {
      cabin.debug(err);
    }

    queue.push({
      id: cryptoRandomString({ length: 10 }),
      email: req.body.email,
      send_at: movieTime.subtract(10, 'minutes').toDate()
    });
    await fs.promises.writeFile(queueFile, JSON.stringify(queue));

    // send email
    await email.send({
      message: {
        to: req.body.email,
        subject: 'Booking Confirmed',
        html: '<p>Your booking is confirmed!</p>'
      }
    });

    // send response
    res.sendStatus(200);
  } catch (err) {
    next(err);
  }
});
Now, a job will be scheduled which will send a reminder email 10 minutes before the movie time.
To test the endpoint, we can use curl -X POST http://localhost:8080/book-ticket -d "[email protected]" -d "start_time=7/14/20 4:00 PM" that’ll send out an email when the ticket is booked, and queue an email that needs to be sent 10 minutes before the movie time.
I personally enjoyed how much Bree makes my job to schedule a job easier. You can find the Source Code in this GitHub Repository. I’m on Twitter, Say Hi to me to talk about programming languages, compilers, Rust & a lot more. 😃
You can do a lot more with Bree. Here’s an example from their documentation.
For more information, check out their documentation.
const bree = new Bree({
  //
  // NOTE: by default the `logger` is set to `console`
  // however we recommend you to use CabinJS as it
  // will automatically add application and worker metadata
  // to your log output, and also masks sensitive data for you
  // <https://cabinjs.com>
  //
  logger: new Cabin(),

  //
  // NOTE: instead of passing this Array as an option
  // you can create a `./jobs/index.js` file, exporting
  // this exact same array as `module.exports = [ ... ]`
  // doing so will allow you to keep your job configuration and the jobs
  // themselves all in the same folder and very organized
  //
  // See the "Job Options" section below in this README
  // for the complete list of job options and configurations
  //
  jobs: [
    // runs `./jobs/foo.js` on start
    'foo',

    // runs `./jobs/foo-bar.js` on start
    {
      name: 'foo-bar'
    },

    // runs `./jobs/some-other-path.js` on start
    {
      name: 'beep',
      path: path.join(__dirname, 'jobs', 'some-other-path')
    },

    // runs `./jobs/worker-1.js` on the last day of the month
    {
      name: 'worker-1',
      interval: 'on the last day of the month'
    },

    // runs `./jobs/worker-2.js` every other day
    {
      name: 'worker-2',
      interval: 'every 2 days'
    },

    // runs `./jobs/worker-3.js` at 10:15am and 5:15pm every day except on Tuesday
    {
      name: 'worker-3',
      interval: 'at 10:15 am also at 5:15pm except on Tuesday'
    }

    // runs `./jobs/worker-4.js` at 10:15am every weekday
    {
      name: 'worker-4',
      cron: '15 10 ? * *'
    },

    // runs `./jobs/worker-5.js` on after 10 minutes have elapsed
    {
      name: 'worker-5',
      timeout: '10m'
    },

    // runs `./jobs/worker-6.js` after 1 minute and every 5 minutes thereafter
    {
      name: 'worker-6',
      timeout: '1m',
      interval: '5m'
      // this is unnecessary but shows you can pass a Number (ms)
      // interval: ms('5m')
    },

    // runs `./jobs/worker-7.js` after 3 days and 4 hours
    {
      name: 'worker-7',
      // this example uses `human-interval` parsing
      timeout: '3 days and 4 hours'
    },

    // runs `./jobs/worker-8.js` at midnight (once)
    {
      name: 'worker-8',
      timeout: 'at 12:00 am'
    },

    // runs `./jobs/worker-9.js` every day at midnight
    {
      name: 'worker-9',
      interval: 'at 12:00 am'
    },

    // runs `./jobs/worker-10.js` at midnight on the 1st of every month
    {
      name: 'worker-10',
      cron: '0 0 1 * *'
    },

    // runs `./jobs/worker-11.js` at midnight on the last day of month
    {
      name: 'worker-11',
      cron: '0 0 L * *'
    },

    // runs `./jobs/worker-12.js` at a specific Date (e.g. in 3 days)
    {
      name: 'worker-12',
      // <https://github.com/iamkun/dayjs>
      date: dayjs().add(3, 'days').toDate()
      // you can also use momentjs
      // <https://momentjs.com/>
      // date: moment('1/1/20', 'M/D/YY').toDate()
      // you can pass Date instances (if it's in the past it will not get run)
      // date: new Date()
    },

    // runs `./jobs/worker-13.js` on start and every 2 minutes
    {
      name: 'worker-13',
      interval: '2m'
    },

    // runs `./jobs/worker-14.js` on start with custom `new Worker` options (see below)
    {
      name: 'worker-14',
      // <https://nodejs.org/api/worker_threads.html#worker_threads_new_worker_filename_options>
      worker: {
        workerData: {
          foo: 'bar',
          beep: 'boop'
        }
      }
    }

    // runs `./jobs/worker-15.js` **NOT** on start, but every 2 minutes
    {
      name: 'worker-15',
      timeout: false, // <-- specify `false` here to prevent default timeout (e.g. on start)
      interval: '2m'
    },

    // runs `./jobs/worker-16.js` on January 1st, 2022
    // and at midnight on the 1st of every month thereafter
    {
      name: 'worker-16',
      date: dayjs('1-1-2022', 'M-D-YYYY').toDate(),
      cron: '0 0 1 * *'
    }
  ]
});

// handle graceful reloads, pm2 support, and events like SIGHUP, SIGINT, etc.
const graceful = new Graceful({ brees: [bree] });
graceful.listen();

// start all jobs (this is the equivalent of reloading a crontab):
bree.start();

/*
// start only a specific job:
bree.start('foo');

// stop all jobs
bree.stop();

// stop only a specific job:
bree.stop('beep');

// run all jobs (this does not abide by timeout/interval/cron and spawns workers immediately)
bree.run();

// run a specific job (...)
bree.run('beep');
Alternative: Kue [No Longer Maintained] & Redis
Redis is an open source (BSD licensed), in-memory data structure store, used as a database, cache and message broker. It supports data structures such as strings, hashes, lists, sets, sorted sets with range queries, bitmaps, geospatial indexes with radius queries and streams.
To be precise, it is an in-memory key-value database.
We’ll be using Redis along with a Node JS package called Kue to schedule background process for a simple node js application. Background process usually helps in sending an Email/ notification or running any background process. For instance, in a movie ticket booking application, you need to notify a customer via an email when a seat is booked and remind him/her 10 minutes before the movie time. This will be our use case.
In this article, we’ll write a minimal REST API server with express js. The prerequisite to this blog will be to know how Node JS works and make sure that Redis is installed and running.

Setting up the project
We’ll be using npm init to set up a Node JS project.
First things first, let’s create a directory for your project. I have assumed the project name as node-js-job-scheduling. Using mkdir node-js-job-scheduling , create your directory.
Run npm init until the process is finished. You can also add the required attributes if you like to. You had nothing, but you have this now.
Let’s call NPM for help
We’ll be installing some npm packages to set up a simple express server and test out an API endpoint. Let’s hope it responds to our call on the first try.
Install express & body-parser to set up a simple server that listens to a port.
npm install express body-parser --save
Just Listen
Create a index.js file in the root of the project and set up a simple application like this:
const express = require("express"),
 app = express(),
 bodyParser = require("body-parser");

// support parsing of application/json type post data
app.use(bodyParser.json());

app.get("/test", (req, res) => {
 return res.json({ response: "It Worked!" });
});

app.listen(8080, () => console.log(\`Hey there! I'm listening.\`));
Let’s use Postman to test our API endpoints. To start our server, use nodemon or a command like node index.js . It’s recommended to use nodemon as that’ll automatically restart the server after every change made to the code.
Let’s check if the endpoint responds to our call, open Postman try this endpoint - http://localhost:8080/test
Nodemailer for Mails
Let’s install nodemailer to our project with the help of NPM.
npm i nodemailer --save
Create a file named nodemailer.js in the root of the project and add the following code that’ll send an email to the recipient when invoked. Let’s assume that this method only takes one argument which is the recipient’s email.
const nodemailer = require("nodemailer");

let send = async args => {
 try {
   // Generate test SMTP service account from ethereal.email
   // Only needed if you don't have a real mail account for testing
   let testAccount = await nodemailer.createTestAccount();

   // create reusable transporter object using the default SMTP transport
   let transporter = nodemailer.createTransport({
     host: "smtp.ethereal.email",
     port: 587,
     secure: false, // true for 465, false for other ports
     auth: {
       user: testAccount.user, // generated ethereal user
       pass: testAccount.pass // generated ethereal password
     }
   });

   // send mail with defined transport object
   let info = await transporter.sendMail({
     from: '"Sathish 👻" <[email protected]>', // sender address
     to: args.email, // list of receivers
     subject: args.subject, // Subject line
     html: args.body // html body
   });

   console.log("Message sent: %s", info.messageId);
   // Message sent: <[email protected]>

   // Preview only available when sending through an Ethereal account
   console.log(nodemailer.getTestMessageUrl(info));
   return nodemailer.getTestMessageUrl(info);
   // Preview URL: https://ethereal.email/message/WaQKMgKddxQDoou...
 } catch (err) {
   console.log(`Error: ${err}`);
 }
};

module.exports = {
 send
};
Let’s test out if the Mail part works. We have used an ethereal username and password which will not send out an actual email but yet mimics it. We’ll be getting a link on how the mail will look.
Create an endpoint that invokes the method to send out an email. Before that let’s require our method in index.js
const nodemailer = require('./nodemailer')
app.post("/send-email", async (req, res) => {
  let emailLink = await nodemailer.send(req.body.email);
  return res.json({
    response: `Preview URL: ${emailLink}`
  });
});
Test our endpoint in postman using POST http://localhost:8080/send-email with the following body,
{
	"email": "[email protected]"
}
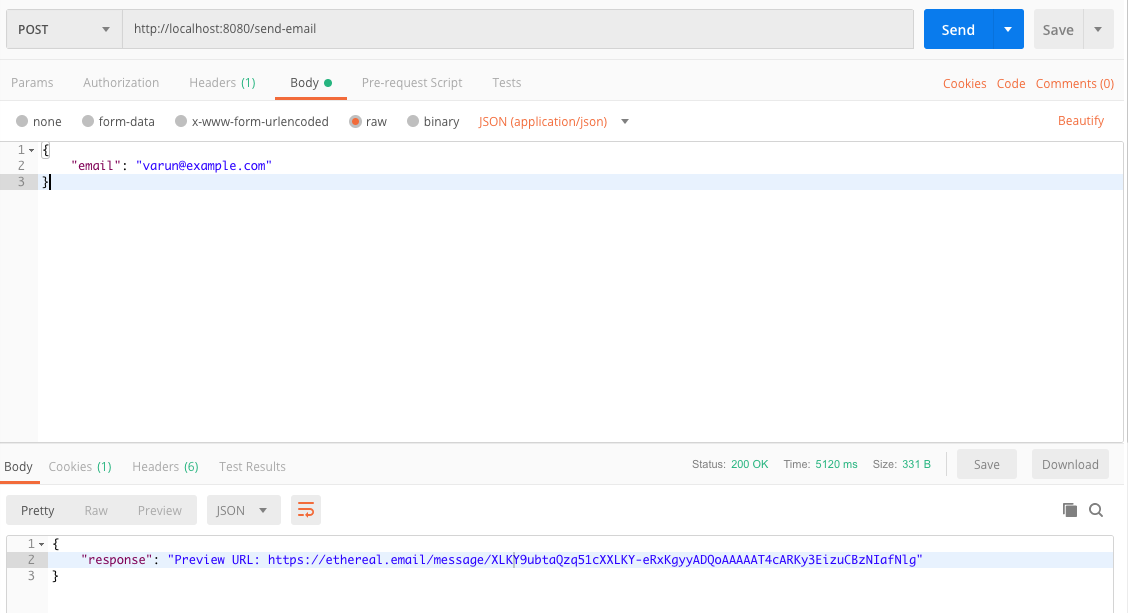
The response will be the E-mail preview link from ethereal -
{
    "response": "Preview URL: https://ethereal.email/message/XLKY9ubtaQzq51cXXLKY-eRxKgyyADQoAAAAAT4cARKy3EizuCBzNIafNlg"
}
Kue for Job Scheduling
Let’s install the required NPM package to schedule a background process. For that, we need to install kue which is a priority job queue backed by Redis, built for node.js.
npm i kue --save
We’ll be writing an endpoint to schedule the background process/job and a worker that’ll process it. For our requirement, it will be sending an email. Let’s assume that a user is booking a ticket for a movie. He/she should be notified twice i.e. When the booking is confirmed (at the time of booking) and 10 minutes before booking.
For refactoring, we’ll separate the job schedule as two different methods. One will be to schedule the job and the other will be to process the scheduled job.
We’ll create a kue.js file that contains the following code block,
var kue = require("kue");
var Queue = kue.createQueue();

let scheduleJob = data => {
  Queue.createJob(data.jobName, data.params)
    .attempts(3)
    .delay(data.time - Date.now()) // relative to now.
    .save();
};

module.exports = {
  scheduleJob
};
The above code will schedule a job which will assign a name and it’s params. Also the delay. We will have one-second delay for rolling out the booking confirmation email and milliseconds timestamp which will be 10 minutes before the start time of the movie.
Job Workers
We’ll create another file named worker.js which will process the scheduled job based on its names. So, in our case, it will be the email job which will roll out emails.
var kue = require("kue");
var Queue = kue.createQueue();
var nodemailer = require("./nodemailer");

Queue.process("sendEmail", async function(job, done) {
  let { data } = job;
  await nodemailer.send(data);
  done();
});
The above code block will make use of the nodemailer utility function we defined previously in this article and send out the email. Note that the arguments/ parameters we passed when scheduling the job will be as an attribute in the first argument of the queue process callback function with the key data. So, we get that with the help of object destructuring - let { data } = job; , and pass it to the nodemailer utility function. Require/Import the worker in index.js file which is our project’s entrypoint.
API Endpoint
We’ll now write an API endpoint /book-ticket that will schedule the job for us in index.js. It’ll schedule two jobs for us. One is to send out the booking confirmation E-mail that has a delay of say, one-second and the second one is to send an email 10 minutes before the booking.
const express = require("express"),
 app = express(),
 bodyParser = require("body-parser");
const kue = require("./kue");
require("./worker");

// support parsing of application/json type post data
app.use(bodyParser.json());

app.post("/book-ticket", async (req, res) => {
 let args = {
   jobName: "sendEmail",
   time: 1000,
   params: {
     email: req.body.email,
     subject: "Booking Confirmed",
     body: "Your booking is confirmed!!"
   }
 };
 kue.scheduleJob(args);

 // Schedule Job to send email 10 minutes before the movie
 args = {
   jobName: "sendEmail",
   time: (req.body.start_time - 10 * 60) * 1000, // (Start time - 10 minutes) in millieconds
   params: {
     email: req.body.email,
     subject: "Movie starts in 10 minutes",
     body:
       "Your movie will start in 10 minutes. Hurry up and grab your snacks."
   }
 };
 kue.scheduleJob(args);

 // Return a response
 return res.status(200).json({ response: "Booking Successful!" });
});

app.listen(8080, () => console.log(`Hey there! I'm listening.`));
The above endpoint makes use of the utility function we wrote to schedule a job. It has a job name, the time (delay) and the email args which is required to send out the email.
The first job is about the confirmation email after a ticket is booked with a delay of one second which is 1000 milliseconds. The second job is about the notification email that should be sent 10 minutes before the start time of the movie. So the delay time is (req.body.start_time - 10 * 60) * 1000 where the start time is a unix timestamp from the request body. The request body will also contain the email of the user to whom it should be sent to.
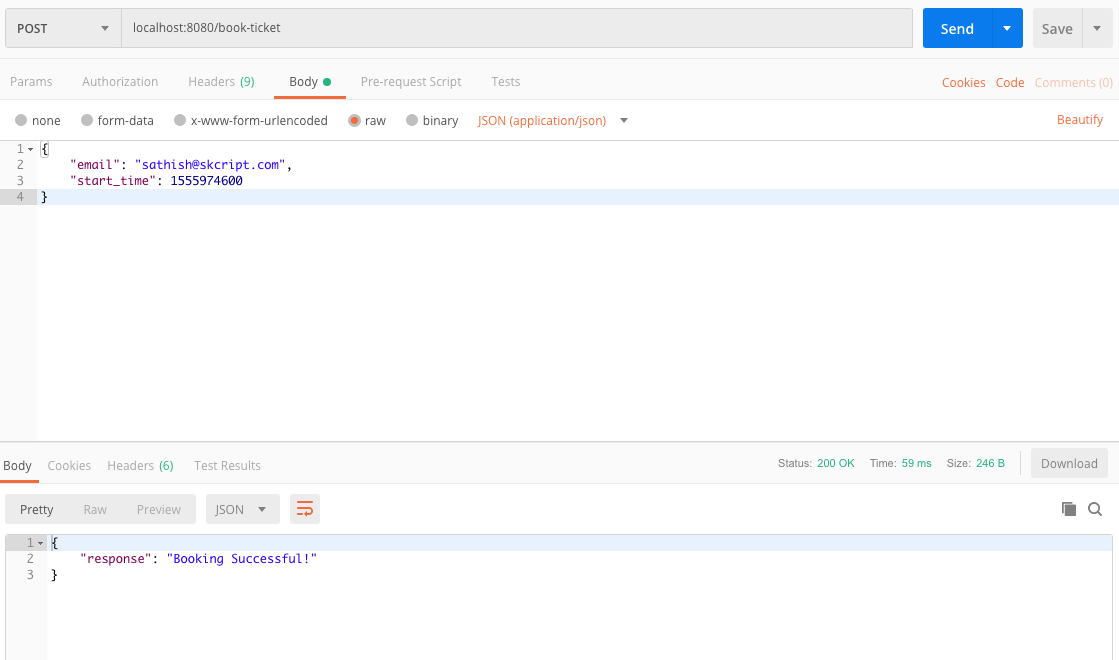
The request body will be as the following,
{
	"email": "[email protected]",
	"start_time": 1555974600
}
Let’s test it again with Postman
The Ethereal preview link will be printed in the console as follows,
Message sent: <[email protected]>
https://ethereal.email/message/XL7wFeJAYA0Dt0R1XL7wGIdA2wzOT3MhAAAAAbyCsQRrhWTVaptU0njFIO0
Message sent: <[email protected]>
https://ethereal.email/message/XL7wFeJAYA0Dt0R1XL7wGg7lLAzJdYNkAAAAAkhU1sH5NPPfG5.x8kRnio8
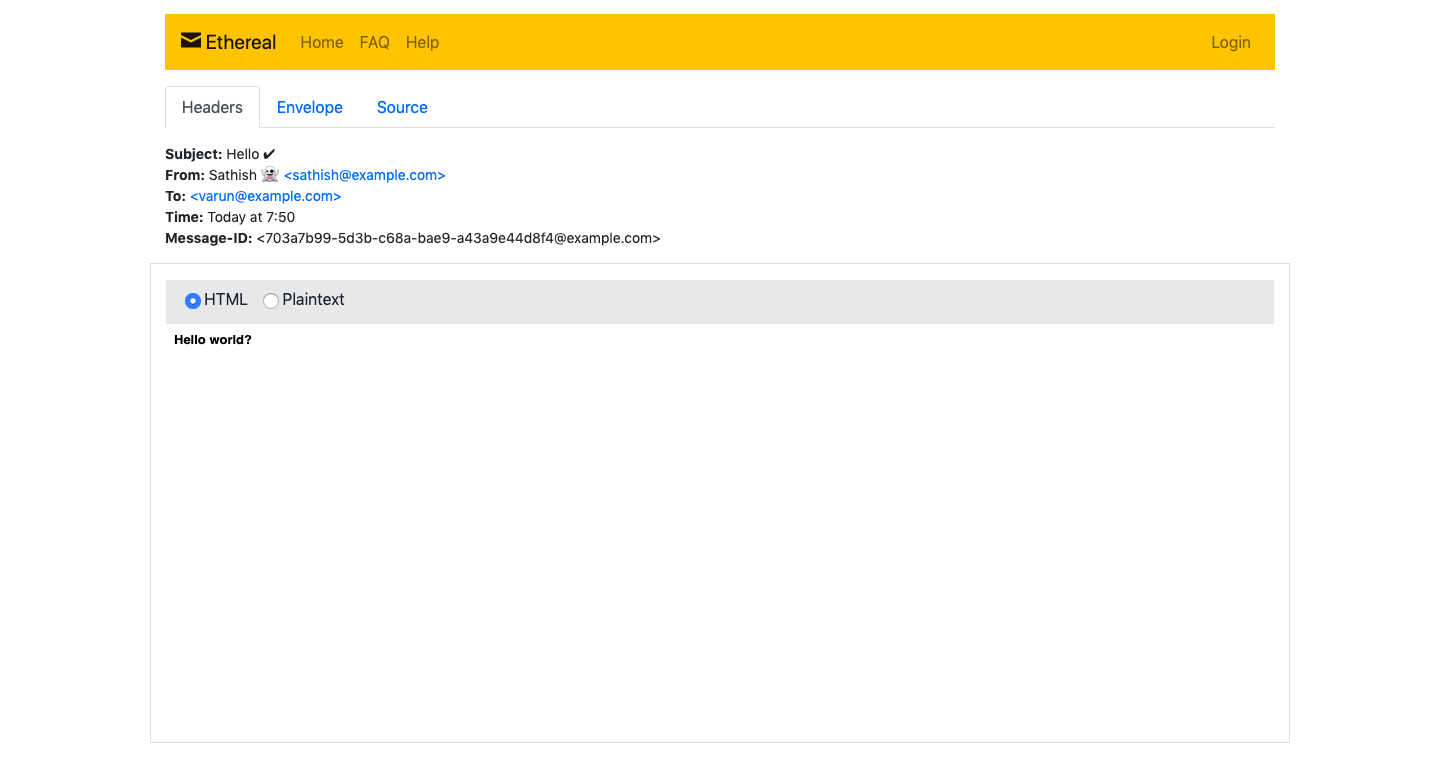
The confirmation E-mail

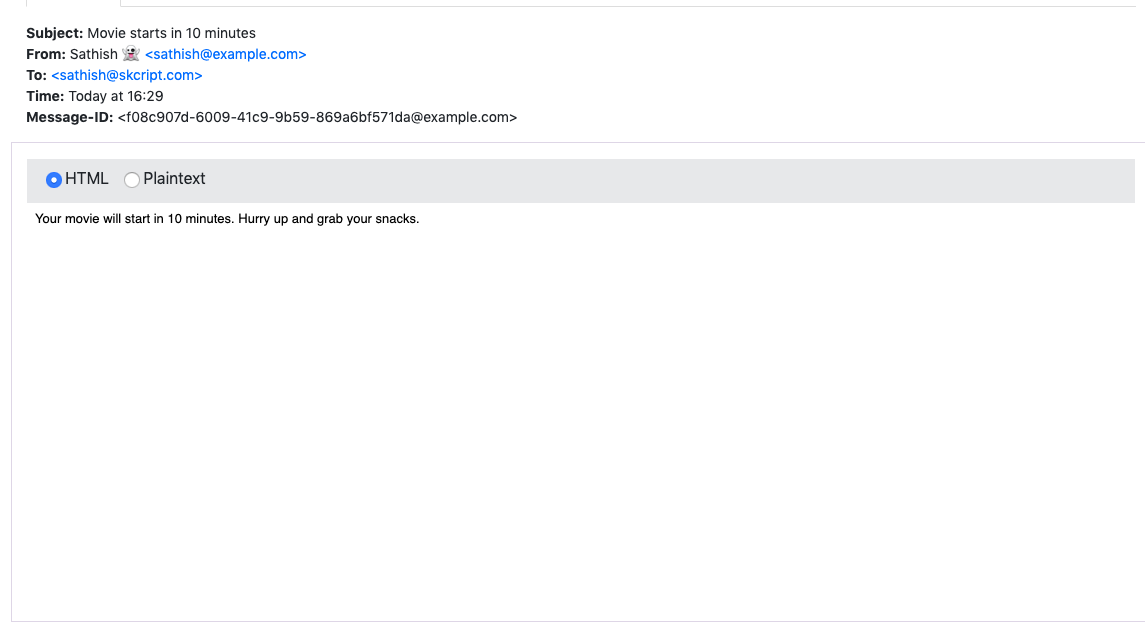
The Notification E-mail
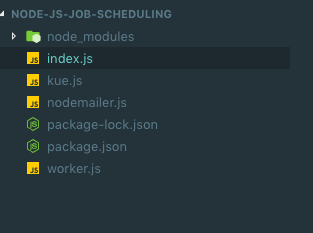
Folder Structure
Our journey ends here and I hope you found this article helpful. You can also find the project on Github or follow me on Twitter for some funny retweets.
Up next
How RPA Technology Is Helping Humanity?