
This blog series is for those who want to start their adventure in android development. Moving from Eclipse to Android Studio? Just installed Android studio? Confused on how to start? You’re in the right place! Learn how to use Android studio for your glory!
This blog is a beginner’s guide for all things in android studio. It aims to cover things you must know before you start your journey as an android developer. I hope this guide is helpful. Share your comments and suggestions in the comments below.
Android application programs are written and functioned based on the OOPS concept. So if you guys are already familiar with java, the concept of android app development will be easy to understand.
What is Android?
Let’s get started with android-studio!
Definitions First :P
Android is a mobile operating system based on Linux that is developed by Google, launched first in 2008 and Android-studio is an Integrated development environment(IDE) for Google’s Android operating system, build on IntelliJ IDEA software and designed specially for Android Development. It is open-source, which means anyone can download, use or modify it.
First, you need to download Android-Studio. I have listed the system requirements that your system needs to support Android studio.
System requirements for Android-Studio
- Any OS Microsoft® Windows® 7/8/10 or Mac® OS X® 10.10 (Yosemite) or higher, up to 10.14 (macOS Mojave) or Linux (32 or 64 bit)
- Minimum RAM size 2 GB
- Recommended RAM size 4 GB or for a better experience, use 8 GB RAM
- Disk space: 500 MB
- Need 1 GB disk space for Android SDK and emulator image
- JDK: Java Development Kit (JDK) 7 or higher
- Screen Resolution: 1280×800 minimum screen resolution
What is SDK?
The Android SDK (software development kit) forms the platform for creating your android application. What SDK contains is a set of development tools to develop applications for the android platform.
An Android SDK includes the following:
- Required libraries (These libraries helps to build an android application)
- Debugger (You can track your error and resolve it by using the Debugger)
- An emulator (You can run an application on a virtual machine with the help of an emulator)
- Relevant documentation for the Android application program interfaces (APIs)
- Sample source code (It has sample and simple example code)
Next, you need to install Android-Studio in your machine.
Structure of a standard Android-Studio
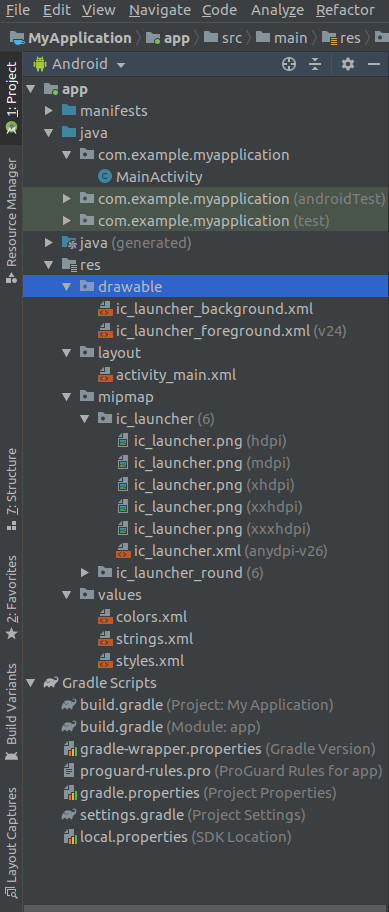
After a successful installation, you will need to create a new project. The above picture shows the standard structure of an android studio project. The project consists of three sections that form the main folders of the project. I have explained each of these folders in detail,
- manifests
- AndroidManifest.xml
- java
- MainActivity.java
- res
- drawable
- layout
- mipmap
- values
1.AndroidManifest.xml
Manifest has all the information we need for our project, which means it is the root directory of the project. It contains the details on the android system about the application requires.
It is a key-file that works as a bridge between the android developer and android platform.
AndroidManifest.xml file allows the user to declare the functionality and user permissions for our application to android. AndroidManifest.xml allows us to define the required details your application needs.
- Packages
The manifest root file requires an attribute for your app’s package name. For example, the following snippet shows the
<?xml version="1.0" encoding="utf-8"?>
<manifest xmlns:android="http://schemas.android.com/apk/res/android"
    package="com.example.myapplication"
    android:versionCode="1"
    android:versionName="1.0" >
    ...
</manifest>
- Permissions
An Android app must require permission to access the user sensitive data and certain system features. For example: user permission to access the SMS send
<manifest ... >
    <uses-permission android:name="android.permission.SEND_SMS"/>
    ...
</manifest>
- Class declaration
You have to declare every class in
<manifest package="com.example.myapplication" ... >
    <application ... >
        <activity android:name=".MainActivity" ... >
            ...
        </activity>
    </application>
</manifest>
2. MainActivity.java
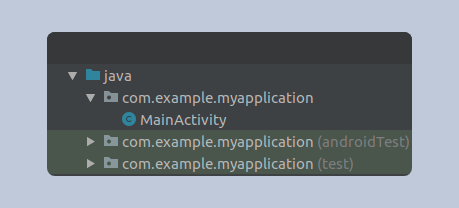
Java folder structure
Moving on to the Java folder,
It contains all your java class files. If you create a page that creates two files, one will be activity_main.xml and other being MainActivity.java file. You should create all your java files inside the com.example.myapplication folder. .java files have all the working functionality of the respective .xml file.
3.res (Resources)
Drawable, layouts, mipmap, and values are placed inside the res folders. It contains all the resources of your project. Each of these folders have unique characteristics.
- drawable
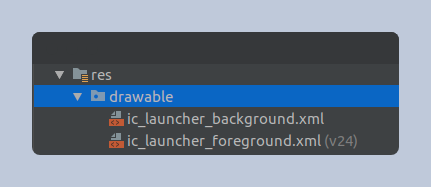
drawable folder structure
You can place your images, gifs and/or animated images here. It has multisource-drawable options, which is used to create an image with multiple resolutions. For example, you can create the design for your buttons and input text.
Check out the illustration below,
<?xml version="1.0" encoding="utf-8"?>
<shape xmlns:android="http://schemas.android.com/apk/res/android"
    android:shape="rectangle" >
    <corners
        android:radius="10dp"
        />
    <solid
        android:color="@color/edit_text_bg"

        />
    <padding
        android:left="0dp"
        android:top="0dp"
        android:right="0dp"
        android:bottom="0dp"
        />
    <size
        android:width="315dp"
        android:height="48dp"
        />
</shape>
Sample drawable.xml file
- layout
A layout defines the structure for a user interface in your app, such as the activity.
All the elements in the layout are created by the hierarchy of view and viewgroup objects. The views are something used to design and interact with the user. The views objects are usually called “widgets” and can be one of the many subclasses, such as Textview and Button.
The viewgroups are usually called “layouts” can be one of many types that provide a different layout structure, such as LinearLayout or ConstraintLayout.
<?xml version="1.0" encoding="utf-8"?>
<LinearLayout xmlns:android="http://schemas.android.com/apk/res/android"
              android:layout_width="match_parent"
              android:layout_height="match_parent"
              android:orientation="vertical" >
    <TextView android:id="@+id/text"
              android:layout_width="wrap_content"
              android:layout_height="wrap_content"
              android:text="Hello, I am a TextView" />
    <Button android:id="@+id/button"
            android:layout_width="wrap_content"
            android:layout_height="wrap_content"
            android:text="Hello, I am a Button" />
</LinearLayout>
Sample activity_main.xml file
- mipmap
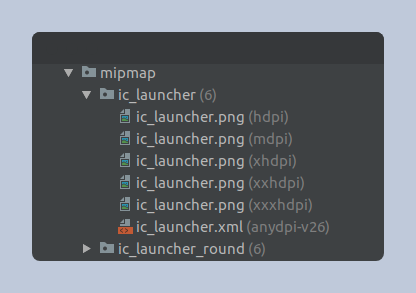
mipmap folder structure
Contrary to the funny name, It plays an important role in your android application. Here, mipmap supports images in .png format only. It doesn’t support gif or any other files. It has multiple resolutions like as (hdpi, mdpi, xhdpi, xxhdpi, xxxhdpi).
- values
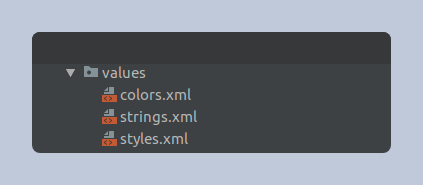
values folder structure
Values folder has three more important files such as colors.xml, strings.xml, styles.xml.
colors.xml
You should declare all the colors that you have used in the android projects. Each and every color tag has a unique name which helps with identifying the color later in the project. You do this with resource reference in android. Have a look at the example to get a better picture on that,
resource reference
In Java: R.color.string_name
In XML:@color/string_name
Syntax
<?xml version="1.0" encoding="utf-8"?>
<resources>
    //Our theme color
    <color name="ThemeColor">#0366d6</color>
   </resources>
strings.xml
A string resource provides text strings for your application with optional text styling and formatting.
resource reference
In Java: R.string.string_name
In XML:@string/string_name
Syntax
<resources>
   <string name="app_name">My Application</string>
</resources>
styles.xml
A style resource provides the styles for your application and looks of your UI. A style can be applied to view or activity or whole application.
Syntax
<resources>
   <!-- Base application theme. -->
   <style name="AppTheme" parent="Theme.AppCompat.Light.DarkActionBar">
       <!-- Customize your theme here. -->
       <item name="colorPrimary">@color/colorPrimary</item>
       <item name="colorPrimaryDark">@color/colorPrimaryDark</item>
       <item name="colorAccent">@color/colorAccent</item>
   </style>
</resources>
build.gradle
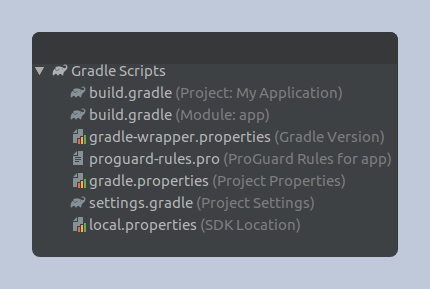
gradle folder structure
Gradle is a build technique(open source) which is used to automate building, testing and deployment. Each project requires a gradle file for generating an apk from .java and .xml files from the project. The gradle tasks are simply converts all the .java files to dex files and compressed them into a single file known as apk.
There are two types of build.gradle
- Top-level build.gradle (Project: MyApplication)
- Module-level build gradle (module:app)
Top-level build.gradle (Project:MyApplication)
Top-level build.gradle is located in the root directory of the project and its main function is to define the function of an application and applied into all the modules. It will be implemented as
// Top-level build file where you can add configuration
// options common to all sub-projects/modules.

buildscript
{

    repositories
    {
        google()
            jcenter()
    }
    dependencies
    {
        classpath 'com.android.tools.build:gradle:3.0.1'

        // Do not place the application dependencies here;
        // they belong to individual module build.gradle files
    }
}

allprojects
{
    repositories
    {
        google()
            jcenter()
    }
}

task clean(type
        : Delete)
{
    delete rootProject.buildDir
}
Module-level build gradle (module: app)
Module-level build gradle (module:app) is located at the project/module of the project and gradle script is where all the dependencies are defined and the sdk versions are declared. The main function is to override the settings in the app manifest or top-level build.gradle. It will be implemented as
// The first line in this file indicates
// the Android plugin is applied for Gradle to
// this build

apply plugin : 'com.android.application'

android
{
    compileSdkVersion 26 defaultConfig
    {
        applicationId "example.mehakmeet.geeksforgeeks"
        minSdkVersion 19
        targetSdkVersion 26
        versionCode 1
        versionName "1.0"
    }
    buildTypes
    {
        release
        {
            minifyEnabled false
            proguardFiles getDefaultProguardFile('proguard-android.txt'), 'proguard-rules.pro'
        }
    }
}

dependencies
{
    implementation fileTree(include
                            : [ '*.jar' ], dir
                            : 'libs')
        implementation 'com.android.support:appcompat-v7:26.1.0'
}
In this blog, I just explained how the Android Studio folder structure works. I hope you guys find this blog helpful. In my next blog, we will see the basic widgets and component used in android application. Bye guys, until my next blog release.
Up next
Go for Go